Research class(TA)
 Photo by Jingyi HUANG
Overall introduction
This course aims to provide students with a good understanding of the principles and applications of robot path planning and control through simulations and experiments. Throughout the course, we utilize a laboratory-developed simulation platform for control and planning simulations. Subsequently, we conduct control and planning experiments using DJI’s RoboMaster EP(UGV) and TT(UAV), along with indoor positioning using UWB devices from nooploop company. After students have learned the control and planning theories, they can deepen their understanding through simulations and physical experiments. The course consists of eight sessions: the first three sessions cover relevant theory presented by Assoc. Prof. HAN Liang, the following three sessions involve my instruction on simulation and physical experiments, and the final two sessions include the evaluation of simulation and experimental results.
Course content
Theory part
- Control theory: Assoc. Prof. HAN Liang explained linear systems, introduced modeling methods for first-order and second-order systems, discussed control principles based on feedback, and explained the principles of PID control, including how the proportional, integral, and derivative components each affect the system.
- Path planning theory: Assoc. Prof. HAN Liang explained the problems that need to be addressed in path planning, which involve finding a collision-free path from point A to point B on a given map. Additionally, the teacher discussed some graph-based path planning algorithms, such as A*.
- Basic hardware knowledge: Assoc. Prof. HAN Liang explained the fundamental principles of multirotor drones and demonstrated using the DJI Robomaster TT(quadrotor) and its official app. The teacher explained how quadrotors can adjust their attitude by changing the rotational speed of their propellers. Assoc. Prof. HAN Liang also introduced the principles of a Mecanum wheel robot, demonstrating with the DJI RoboMaster EP Mecanum wheel robot and its official app. The teacher explained to the students how Mecanum wheel robots can achieve motion in different directions by adjusting the wheel speeds. We chose Mecanum wheel robots because their dynamic model is relatively simpler when comparing to Ackermann steering vehicles, and they can be simplified to a first-order or second-order system.
- Basic software knowledge: I primarily introduced the why we use and how we use Anaconda, as well as how to utilize PyCharm for Python development. In the classroom, I guided students in establishing a virtual environment called ‘Research Class’ for the development of simulations and experiments. I also introduced and demonstrated the simulation platform developped by our lab, providing an explanation of the code responsible for control and planning. I explained how to execute the code for the experimental section and parts related to control and planning.
Simulation part
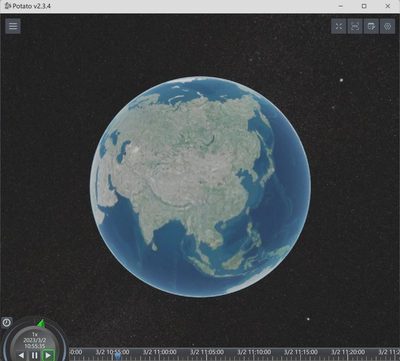
Potato is a large-scale cluster simulation platform developed by our lab. To meet the needs of this class, we have developed a minimal example using the simulation platform display end as the GUI - potato-mini. Students can design and develop agent dynamics, add task environments, and perform control/planning algorithm simulations in potato-mini. Potato-mini is mainly divided into two parts, one is the simulation platform display end, and the other is Potato central. First, download and unzip the display end file Potato-3.x.x.zip, find the Potato.exe in the root directory and double-click to open it, the interface is as shown in the figure below.

After opening the display end, open the Potato central part’s code. Unzip the project file Potato-mini and open it with Pycharm (Open PyCharm, select “File” in the upper left corner, click “Open”, open the potato-mini-master file, and you can open the potato-mini project). The development of the simulation part is mainly carried out in the main code of Potato-mini.
In Potato Central, there are three main components that students need to modify: path planning algorithm, path design, and control.
- Path Planning Algorithm: The path planning algorithm was developed by Chen Xuwen, mainly using the A* algorithm. Students need to modify and implement their own path planning algorithm. The main code is in
planning.py. Students need to refer to theAStarclass, design related methods, and replace the code for path planning.
- Path Design: I am responsible for the design of the planned path. In
central_demo.py, based on the given waypoints, I connect them as a path. The agent needs to follow the existing path until the distance to the next waypoint is less than a threshold, then update the path until the destination is reached. Students need to modify and implement their own path design, such as writing the entire path as a function of time t.
- Control: I am responsible for the control part of the code. I designed a path tracking control algorithm based on vector field algorithm, mainly using a PID controller. The main part of the PID controller is in
controller.py. Students need to modify theSecondOrderControllerclass to design their own controller. Students can also modify the corresponding control parameters when instantiating the controller incentral_demo.pyto improve control effects.
Experiment part
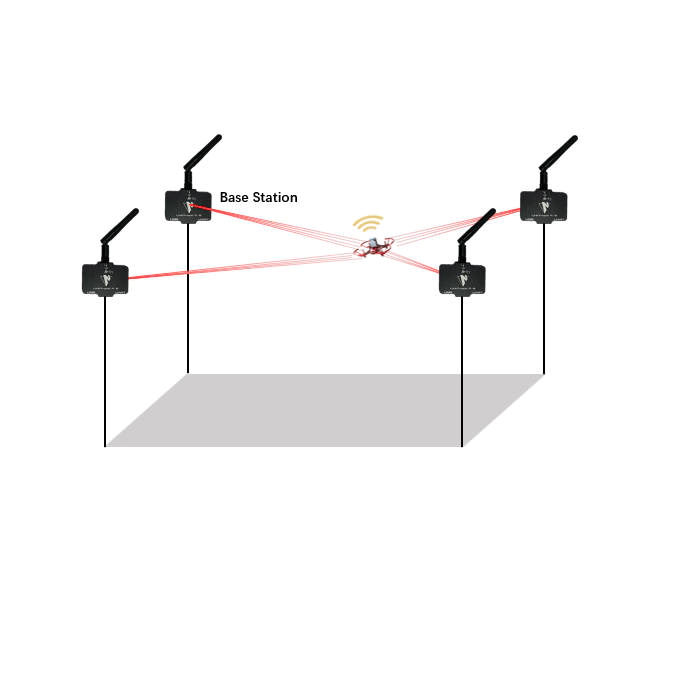
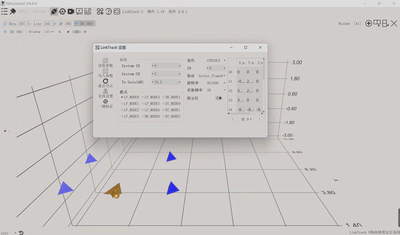
- UWB device: We utilize the LinkTrack product developed by nooploop company for positioning unmanned aerial vehicles (UAVs) and unmanned ground vehicles (UGVs). The Ultra-Wideband (UWB) equipment used in this course requires the use of base stations, a console, and tags. The powered base stations are arranged in a specific pattern, with the powered tags placed in the middle of the base stations. The console is connected to the computer to receive information from the base stations and tags, thereby obtaining the position of the tags. We will use four base stations, labeled as A0, A1, A2, and A3. All UWB equipment needs to be powered for use, and the console must be connected to an antenna.

- Robomaster TT: We utilize the DJI Robomaster TT for our experiments. I set the drone to network mode, allowing it to connect to the router. Simultaneously, my computer also connects to the same WiFi network, enabling the transmission of information between the computer and the drone via the router. Based on prior map information, we can initially plan a collision-free path. Then, using UWB, we locate the drone’s position, calculate the error between the drone’s actual and desired positions, and compute the drone’s control input through a control algorithm. Finally, we send the control input to the drone via WiFi, achieving control of the drone.
- Robomaster EP: Similarly, I set the EP to network mode, allowing it to connect to the router. At the same time, my computer also connects to the same WiFi network, enabling the transmission of information between the computer and the EP via the router. Based on prior map information, we can initially plan a collision-free path. Then, using UWB, we locate the EP’s position, calculate the error between the EP’s actual and desired positions, and compute the EP’s control input through a control algorithm. Finally, we send the control input to the EP via WiFi, achieving control of the EP.
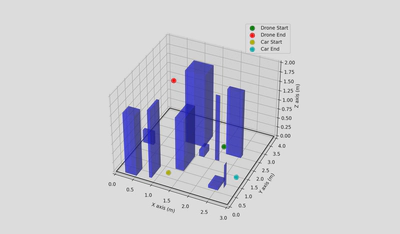
- Map design: I designed a 4m*3m map, which can be simulated in Potato and also verified in experiments (the size of the lab cannot support large indoor experiments). The map contains some random obstacles. The drone and the unmanned vehicle need to navigate around these obstacles to reach the target point.

Results
The students completed both the simulation and experiments, enhancing their hands-on and coding abilities, and deepening their understanding of control and planning algorithms.
The following video is the final planning and control experiment of RM EP, filmed by the students.
My role
Initially, I completed all the simulation and experiments, and organized the related steps and knowledge into a document, which I then explained to the students in class. I was also responsible for the preparation of the course, including preparing hardware devices and course materials. Additionally, I was in charge of the course evaluation, which involved assessing the students’ simulation and experiment results, as well as evaluating their course reports.